
ASP.NET Core is a cross-platform, high-performance, open source framework for building modern, cloud based, Internet web applications.
There are more advantages of .NET Core over .NET Framework includes:
- Cross-platform. Runs on macOS, Linux, and Windows.
- Improved Performance.
- Side-by-Side app versioning.
- Open Source
ASP.NET Core integrates seamlessly with popular client-side frameworks and libraries, including Angular, React, and Bootstrap.
ASP.NET Core ships entirely as NuGet packages.
Build web applications using ASP.NET Core MVC:
- The Model-View-Controller (MVC) pattern helps make your web APIs and web apps testable.
- Razor Pages (new in ASP.NET Core 2.0) is a page-based programming model that makes building web UI easier and more productive.
- Razor markup provides a productive syntax for Razor Pages and MVC views.
- Tag Helpers enable server-side code to participate in creating and rendering HTML elements in Razor files.
- Model binding automatically maps data from HTTP requests to action method parameters.
- Model validation automatically performs client- and server-side validation.
Microsoft provides ASP.NET Core components to download for Windows/Linux/MacOS
Screenshot:

Steps for creating First My Web Application:
In this example – I am using Visual Studio 2017 with ASP.NET CORE 2.0
Step 1: New Project and select ASP.NET Core Web Application
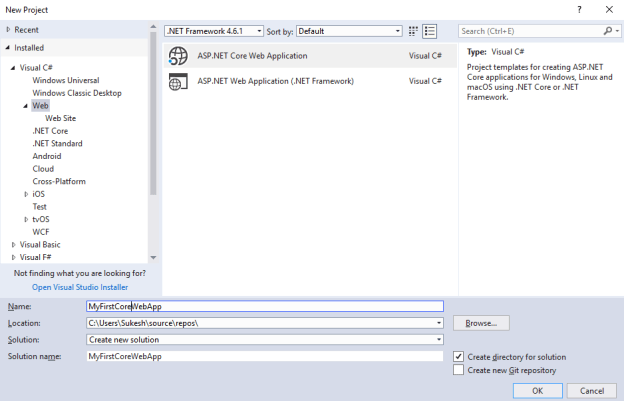
Step 2: Below Dialog will offer you different starting points for your application – here I have selected ASP.NET CORE 2.0 and selected Empty (template)

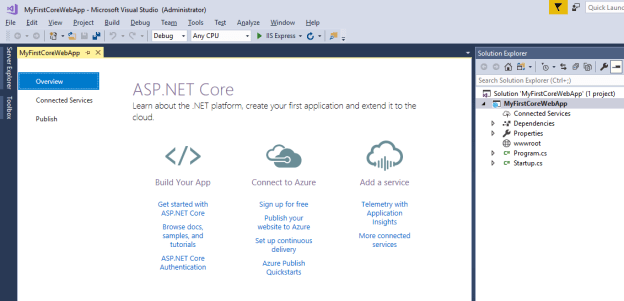
Step 3: Visual Studio will create Project solution with Dependencies from Nuget package
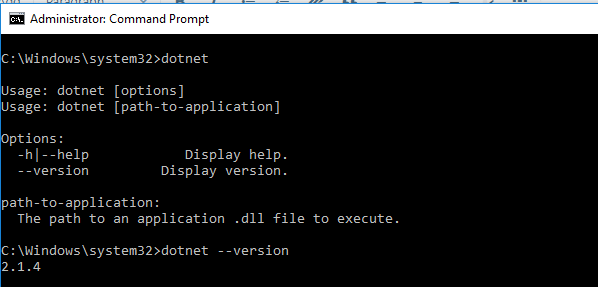
Step 4: open Command prompt and .NET CORE CLI
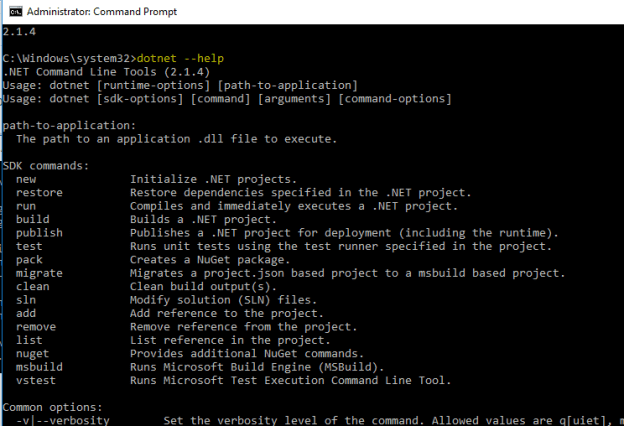
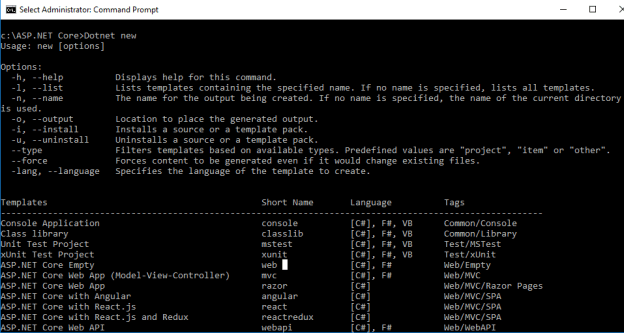
Step 5: Creating new project using Command Prompt – with “new” keyword it will provide list of available project templates
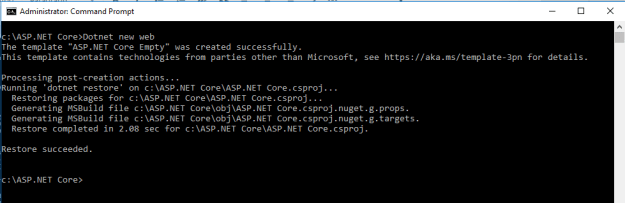
Step 6: I choose to create Web project from Command Prompt with “web” keyword, this will going to create new web project with same name of folder – in this case it will be “ASP.NET Core”
Step 7: Now we are good to Run our application from Command Prompt using keyword “run”. It is running on “http://localhost:5000/”

Step 8 : This is last step to check our application in browser on localhost URL – browser showing output “Hello world!”.

